Restful API Exercise
Objective: The goal of this exercise is to get an overview how the RESTful API in FLIR cameras works and how it provides an interface to the new generation FLIR cameras not available in old cameras.
Requirements: This exercise requires a FLIR camera supporting the RESTful API and a computer connected to the same network.
Introduction
RESTful API is short for REpresentational State Transfer Application Interface. It is a way for two software to communicate with each other. Usually RESTful APIs are used by developers to retrieve data from an online service. For example, an app developer might need to get information about the current weather in a certain location, she could then use a weather forecast provider such as openweathermap.org. If she is looking for the current weather in London, she can use a sample RESTful API call. The last section of the call is the API-key which is a unique identifier that every app developer needs to have (not implemented in all RESTful APIs). Using this way of getting data from a service provider is very popular today, another example of a RESTful APIs is Skyscanner which gives information about flights, hotels and rental car prices. Using the Skyscanner API interface makes it easy to create your own website or app that embeds the information available at Skyscanner.
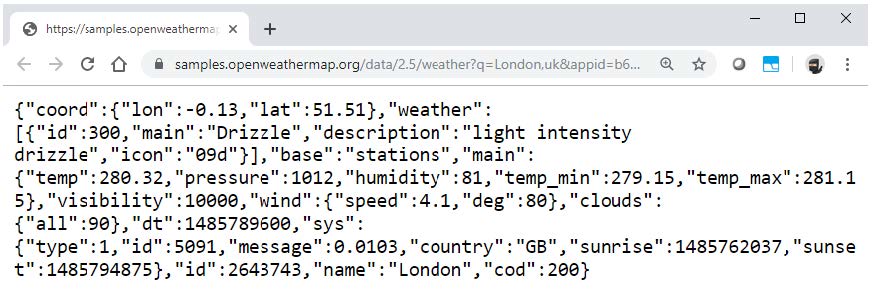
The image above shows a typical response from a weather service provider, in this case it provides the current weather in London. It might look cryptical at first, but it is not intended for human eyes. If one looks closer, one can see the weather data. The app developer can create an application that polls this data and use it in the app itself. In the following exercise, you will create a simple web page that reads the temperature data from a FLIR camera. The RESTful API is a powerful tool for creating applications without the need for developer specific SDK.
Instructions
1. Connect your computer to a network which also hosts a FLIR camera with RESTful API support, the camera can be connected directly to the computer or via a switch/router.
2. Start the camera web interface by opening a web browser and navigate to the camera IP address. If you are unsure about the IP address, use the software FLIR IP Config to find the camera. Add a spot anywhere on the image.
3. Open a new tab in the same web browser, navigate to this page. The result should look something like the image below.
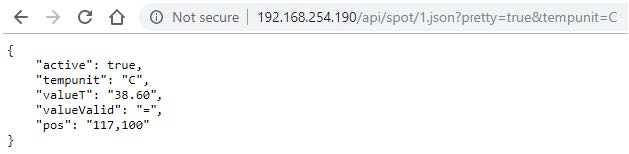
The result is five lines with information, the first line indicates that the spot function is active, the second line indicates that the unit is Celsius, the third line is the temperature value of the spot, the fourth line indicates that the spot value is within the temperature range. If it says something else than “=”, the value is not trustworthy (a NUC might be needed for example). The last line describes the position of the spot. It is possible to get information about boxes, lines, alarms and even images by using other URLs. Refer to the camera documentation for detailed URLs.
4. Create an empty text file and name it test.html (right click anywhere on the Windows desktop and press New -> Text Document), when the file is created, right click on it and press Open with Notepad. Add the following code snippet to the text file:
<script>
var Httpreq = new XMLHttpRequest(); Httpreq.open("GET","http://192.168.254.190/api/spot/1.json?pretty=true&tempunit=C",false);Httpreq.send();
var json_obj = JSON.parse(Httpreq.responseText);
document.write("Spot 1: " + json_obj.valueT + " °C");
</script>
This is a short JavaScript code snippet that simply speaking grabs the data from the provided URL and then displays it in the browser. It is important that your Windows computer is set to show file extensions. Otherwise the file will be named test.html.txt
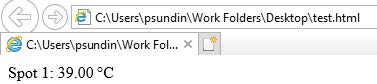
5. Open the text file with Internet explorer. Usually it is easiest to open it with Internet Explorer as Chrome will block running JavaScript locally. The result should look like the image below. If it doesn’t work, it might be due to local IT policies.
It might be needed to press Allow blocked content for the script to work. See image below.
![]()
This is needed as you are most likely not running a local web server on your computer.
6. The next step is to add some more code that displays the box maximum temperature, try and see if you can achieve that yourself! Once the developer has access to all this information, it is quite easy to create a complete application with logging, plotting and other features. Add the code snippet below and try it out. If it works, it should update the temperature of spot 1 four times every second.
<script>
function timerFunction(){
var Httpreq = new XMLHttpRequest();
Httpreq.open("GET","http://192.168.254.190/api/spot/1.json?pretty=true&tempunit=C",false);
Httpreq.send();
var json_obj = JSON.parse(Httpreq.responseText);
document.getElementById("text_element").innerHTML = "Spot 1: " + json_obj.valueT + " C"; }
var timer = setInterval(timerFunction, 250);
</script>
<html>
<p id = "text_element"></p>
</html>
Related Articles
-
 Application Note
Set Up a Local Mail Server and Receive Email When an Alarm is Triggered
Read the Story -
Application Note
Modifying the graphical user interface on the TV CM
Read the Story -
Application Note
Changing the camera model of connected cameras
Read the Story