How to Optimize GigE Network Adapter Settings
To obtain the optimal performance from your machine vision GigE camera, it is essential your GigE network adapter is properly configured. The Adapter Config Utility, installed with the Spinnaker SDK, allows you to control the configuration of your network adapter, optimizing the GigE Ethernet adapter for maximum performance.
The Adapter Config Utility lists your network adapters and allows you to access the following:
- Adapter IP address
- Subnet mask
- Default gateway
- Receive buffers
- Transmit buffers
- Jumbo packets
- RSS
- Media optimization
- CPU Affinity
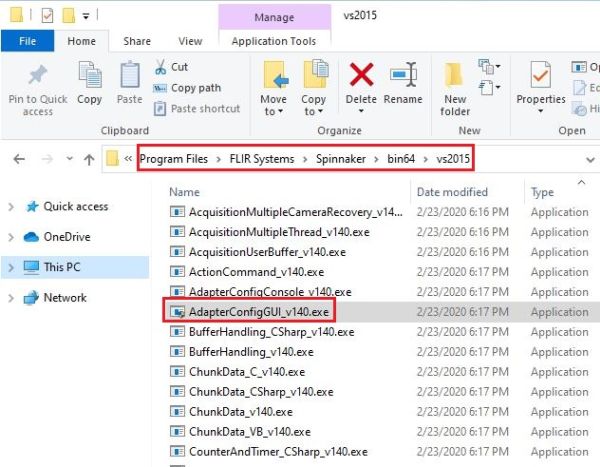
The default location for the AdapterConfigGUI .exe file is C:\Program Files\FLIR Systems\Spinnaker\bin64\vs2015, if you downloaded the Spinnaker 64x Windows and selected to use Visual Studio 2015 in the installation process.
Configuring the Network Adapter
1. From C:\Program Files\FLIR Systems\Spinnaker\bin64\vs2015 open the Adapter Config Utility.
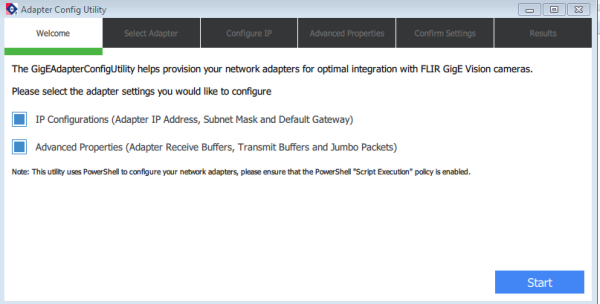
2. Select the settings you would like to configure and click Start.
3. Select the adapter you would like to configure.
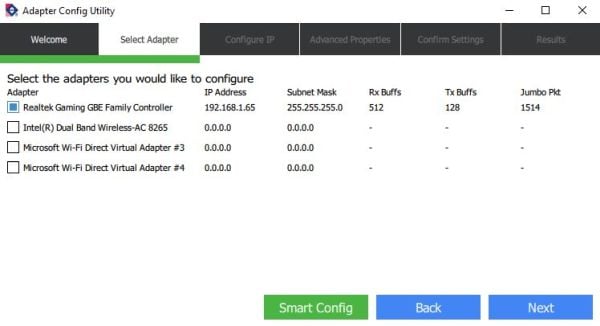
4. To automatically configure the adapter for best performance with machine vision cameras click Smart Config.
OR
4. To manually input your settings click Next and continue steps below.
5. On the Config IP tab click Auto Fill All to assign values automatically or manually enter your values. The camera and network adapter must be on the same subnet for the camera to show up in SpinView.

6. Click Next.
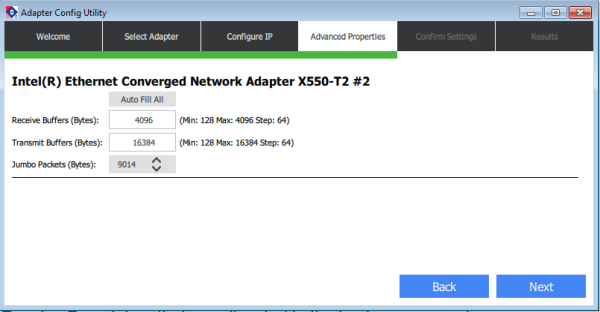
7. On the Advanced Properties tab click Auto Fill All to assign the maximum values the network adapter can support or manually enter your values.
The Receive Buffer is the size of system memory that the adapter can use for receiving packets, which can be increased to help improve the performance of incoming network traffic.
On PCs with limited RAM (<4GB), setting the receive buffer size to the maximum may have a negative impact as buffers consume system memory. On most systems the maximum setting can be applied without reducing available memory.
The adapter uses the Transmit Buffer to send packets.
Jumbo Packets influences the number of interrupts generated which affects CPU usage. The larger the packet size, the fewer the interrupts for the same amount of data. To minimize CPU usage, increase the packet size.
The upper limit depends on your host adapter, your Ethernet switches (if used), and the camera. Usually, the limit is 9000 or 9014.
Select 9014 for Jumbo Packets. If your adapter does not support such a large packet (or MTU) size, then you will experience slightly higher CPU usage.
Select Dedicate a processor for RSS to reserve a processor dedicated for the adapter. Note that if hyperthreading is supported, you should select an even-numbered (physical) CPU.
8. Click Next.
9. On the Advanced System Configuration tab to enable Media and CPU Affinity Optimization.
When enabled Media Optimization prioritizes the camera streaming over the delivery of other media (such as video playback) in other applications.
CPU affinity is a service that periodically updates a bit mask to all active processes.

10. Click Next.
11. Confirm your settings and see your results.